

Introduction :
 |
| Introduction to Python and Jupyter Notebook installation |
3. [Hindi]Machine Learning : Introduction to Python and Jupyter Notebook installation | 2018
In this Article we are going to see that what are the options we have for programming in terms of IDE's. I really like python traditional PYTHON IDLE environment. It's simple, quick and easy to work with, with a very simple interface. But in this world of ide's we have lot's of choices available in terms of IDE like Pycharm, Jupyter, Atom, Sublime, Spyder etc... For those, who have less RAM(< 4GB) and slower processing speed, python inbuilt IDLE is a good option. But i am not saying that those don't have to try IDE's but for them it's better according to there system, these should guys look for suitable options.
If you talk about me in this series specially for the programming purpose i am going to use Jupyter Notebook IDE. It's my no. 1 choice if you are working on data science or machine learning. Why Jupyter ? I give you few reasons after that you will also going to start work on this tool.
1. It's a browser base IDE. What does it mean ? and any advantage behind the scenes. Well yes, first of all because it's browser base it won't take much RAM. So obviously it works faster than most of the offline IDEs.
2. It can also work on Offline as well as Online.
3. It's a very efficient tool for those who has less system configuration(RAM < 4 GB, Processor < i3).
4. Jupyter notebook also support multiple programming languages like, python, node js, php, ruby etc...
5. Last but not the least, it's open source and it support's cross platform.
Website Link for installation:
1. http://jupyter.org/install
Installation Procedure :
Note: We are going to do this installation on Windows 10 platform for Python programming language.
1. Go to search option in Windows 10 and search for "Command Prompt".
2. Then you have to go to bellow mention location with the help of command prompt
cd C:\Users\MYLENOVO\AppData\Local\Programs\Python\Python37\Scripts
Note: MY LENOVO is my system user you have find your own.
3. After that you have to type below mention command to install Jupyter notebook.
pip install jupyter
and after that you have to hit Enter key. After that you will see that jupyter notebook has starter installing on your system. Installation time depends on your internet connection speed.
4. At the End to start the the jupyter notebook you have to type
"jupyter notebook" on command prompt and hit Enter key.
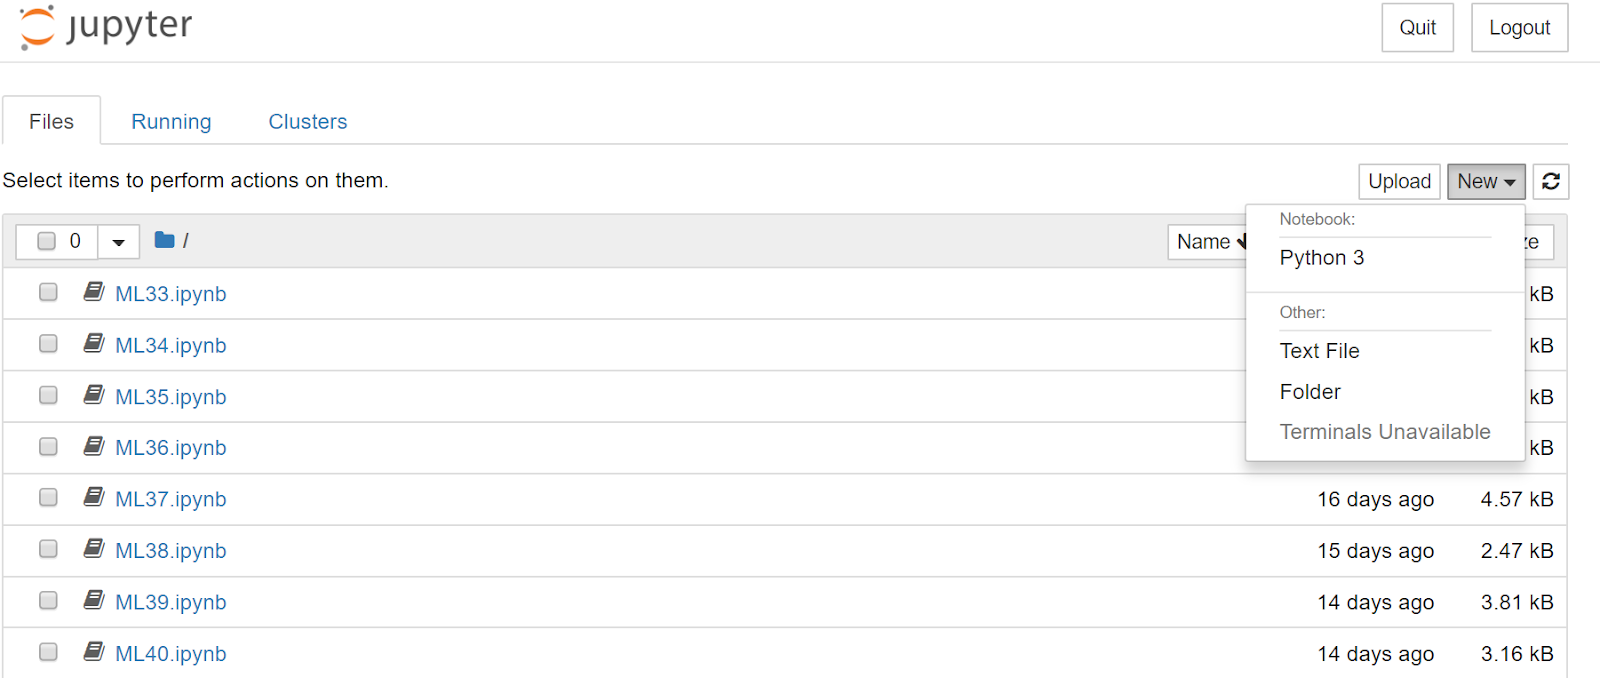
and if everything go according to the instruction you will see open Jupyter notebook interface on your default web browser like this,

5. Then to create new file you have to click on "New" option (as shown in the figure) and select python 3 to create program file.
6. That's now you are ready to go. Enjoy!!!!!!!
Jupyter Notebook Codes for Tutorial 3:
print("Hello World")
print(1+3)
print(2*4)
print(4/2)
print(22/7)
print(22//7)
print("Python strings are very easy to use")
print("Hello"+" World")
greeting = 'Hello'
name = 'vishwajeet'
print(greeting+name)
print(greeting+' '+name)
print('We can even include "quotes" in strings')
YouTube Video :

![[Hindi]NLP 17# Stop Words |NLP|Python 3|Natural Language Processing|2019](https://blogger.googleusercontent.com/img/b/R29vZ2xl/AVvXsEij10fOG8z8OuUqN-H5cnUnN8Ntkd5uVQD8INX8VtKBQaB6JYc8Z4tIA5hn7by-jw-oS57D2UPlbpo-310MKQTMZ6DIme4u-nP_PNv1FbEwJd85jZp2_Wz6eCDxuziLL_lhqNyeBTTMY2Y/w100/NLP.png)

0 Comments